

Workshop Organization- Before and After
This post is sponsored by The Home Depot with affiliate links.
In my previous workshop, I spent almost no time or money making it a nice place to be. I was a gladiator. There to mangle and maim wood to do my bidding. It was a very inspiring place for me, but I was ashamed to bring people there. If I am honest with myself, there were a few times it might have taken me just a few minutes to find things. Important things like my tape measure, a pencil, or sometimes my table saw.
In my new workshop, things are going to change. Before we were even thinking of moving, I made workshop organization my New Year’s Resolution. I have partnered with Home Depot to make this space a marvel of organization and tidiness and KEEP MYSELF INSPIRED & PRODUCTIVE in my shop.
Let me give you the run-down of what it was like when I first moved in, and where it is now.
The Old Workshop
My old shop was a quaint, detached 2-car garage, approximately 400 square feet. It had a lovely brick wall and was the foundation of my woodworking career, but I grew out of it. I had too many tools and needed room for more, and it was time to build something more permanent.
My new shop started as a typical suburban 3-car garage. I went from around 400 square feet to 600 square feet, which was nice. It is insulated, including the garage doors, and has a couple of windows looking out into the woods. But, it only had 4 electrical outlets. And it was white…very white.
After moving in, inevitably the things that fit (however snuggly) into my smaller workshop somehow overloaded my larger shop.
Powering my New Shop
But first things first, I had to add more power. Out of the box I had 1 30amp 220v outlet, and 4 110v outlets…not enough for a shop mind you. So I summoned the gingers to my shop attic and got to it. My buddy, Dustin from @ElectricianU, and I added 14 110v outlets and 3 220v outlets for the rest of the tools to get set up. Now we’re powered up.
Workshop Design: Walls and Floor
Another thing I wanted to address in the new shop was the shop look and feel. Where better to start than the walls and floor? I wanted a fully mobile workshop and you just can’t have that with fatigue mats all over the place. I had to find the perfect option.
Initially, epoxy coverings were considered. But that was expensive, didn’t fix the problem of fatigue, and I don’t look good in Crocs. Next, I looked at full rubber flooring, like you see in a gym (or so I’ve heard) but that stuff gets tacky when outdoors and sawdust sticks to it (no bueno.) Finally, I came across SwissTrax flooring, as you see in fancy auto garages and car shows from a company called ManCaveFlooring. This stuff is awesome! It can be vacuumed (thanks, Mak) BUT it hides the sawdust between the grates, perfect to keep things looking clean and super easy to install, fun even.
I also wanted to handle my first order retrievable tools on the walls. There was a bunch of pegboard on the walls but pegboard sucks the fun right out of a room, so I went with WallControl’s awesome new matte black metal pegboards because #matteblackeverything and all that.
One step closer, and this stuff looks great.
Tools and What Not
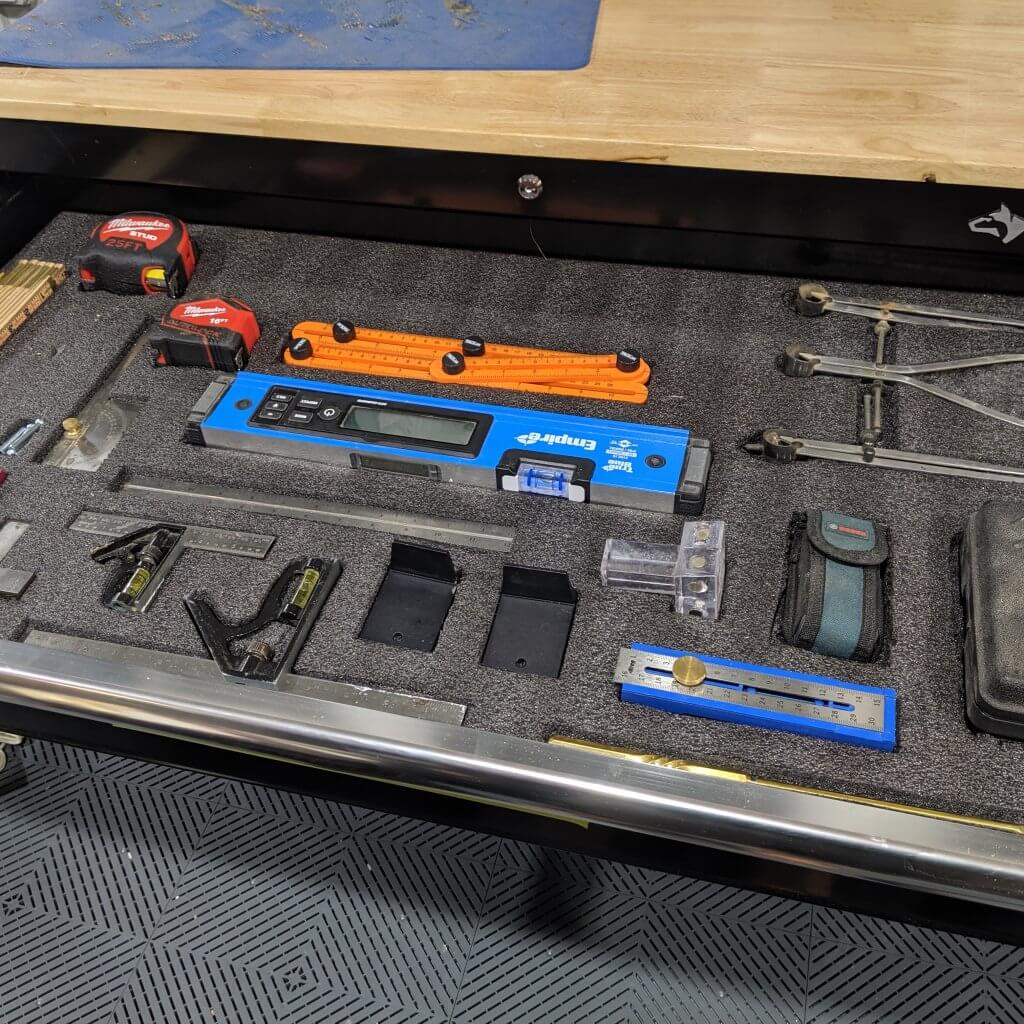
After I got the Wall Control boards up, I needed to find a way to get the rest of my tools in place. This is where Home Depot comes in. I used a bunch of awesome stuff from Husky to organize my workshop and make it feel like a space that you want to be in. The first step was organizing my 46” Husky tool cabinet using FastCap Kaizen foam. I had already figured out which drawer everything belonged in, but I still had to dig through to find what I was looking for. Now everything is shadowed perfectly into its place.
Shelving, and lots of it
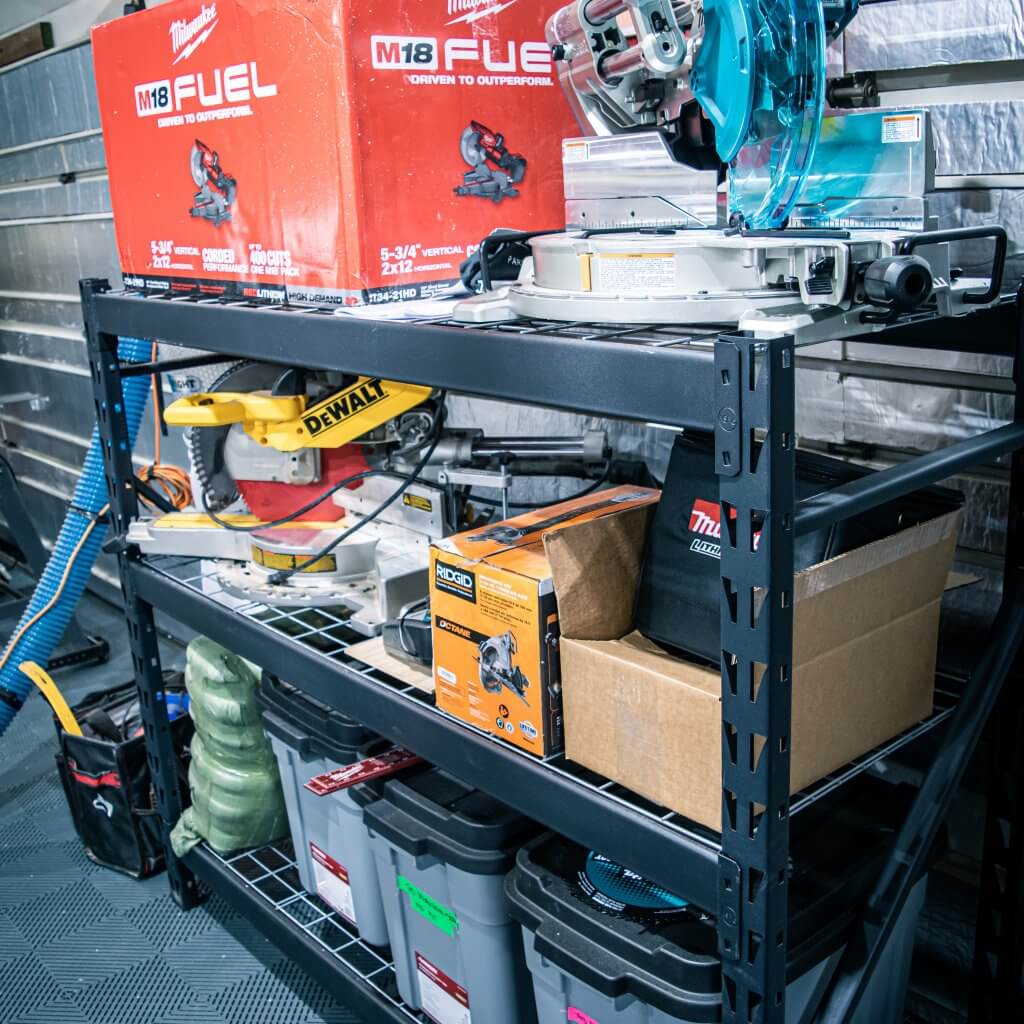
I also needed to manage the inflow of tools for reviews, materials for projects, and outflow for giveaways…you know Youtube stuff. For this, I used this awesome 65” welded shelf from Husky. Overkill? Maybe, (each shelf holds 1500lbs) but a boy can dream, right? It fit the space perfectly, and now this stuff doesn’t clutter up my entry foyer anymore.
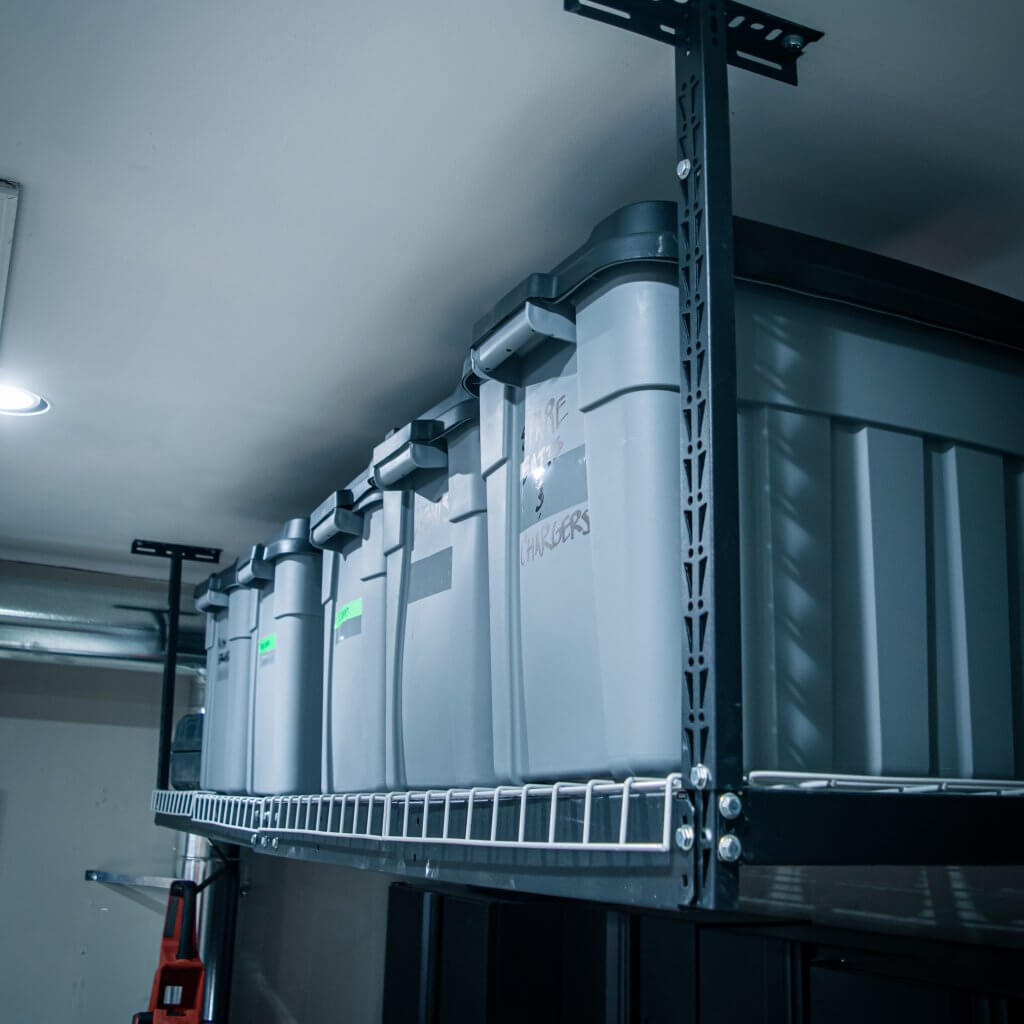
Additionally, I also used one of Husky’s ceiling mount racks that hold 600lbs of stuff for a sort of overflow and to keep 4th order retrievable items up and out of the way. Husky’s 18 Gallon Storage totes were used to sort everything out.
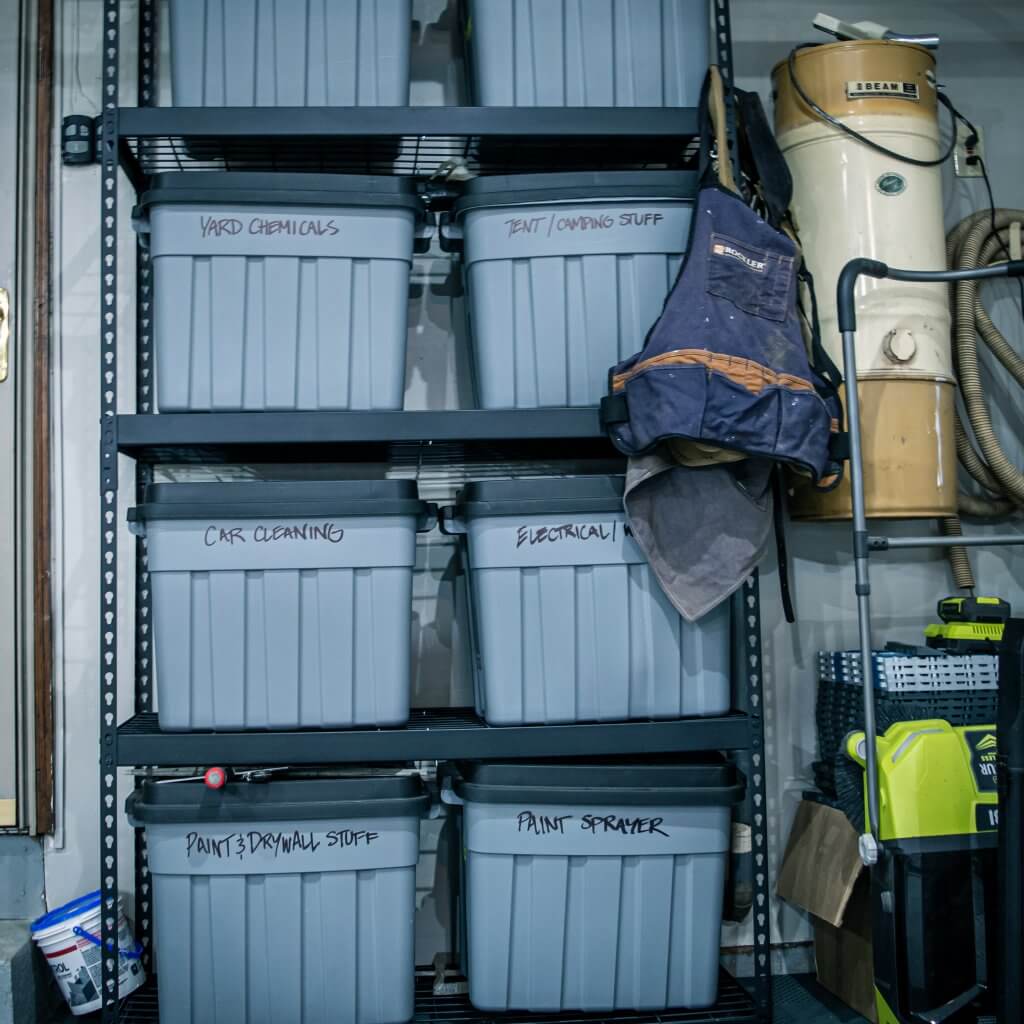
The garage is a dedicated workshop space, but I am not above having to store odds and ends from the house. For this, I saved one dedicated space next to the whole home vacuum system to store yard chemicals, household cleaners, painting supplies, and all that nonsense.
Therefore, I used a bunch more of the 18 gallon totes and Husky’s super tall storage shelf. I like it because it fits together quickly and it’s a great way to get ample floor to ceiling storage. It’s also matte black (#matteblackeverything). This allowed me to get 8 more 18 gallon totes for home stuff and more shop overflow.
After
More to Come
Now that the bones of my shop are in place, it feels great. I recently added a new 18” bandsaw, 20” spiral head planer, and 8” jointer from Laguna. It is helpful to have these tools however, I have more work to do on my work triangle. That is probably next on my list. I also really need to nail my dust collection solution now that I am in a permanent space.
With 200 extra square feet, I can finally accommodate a full-sized assembly table/outfeed table. Plans are to build a fully mobile circular saw station (fully cordless and hoseless is the goal thanks to some of the new stuff from Makita.) My CNC station is due for a remodel- it is eating up too much floor/wall space and just looks too big. Also, I need to figure out a table saw storage station and other shop organizational items. If you are into tidy workshops and solutions, stay tuned to catch all of that here and on my YouTube channel.


